Cinematography Filtration Deep Dive: Diffusion, ND & Polarizers
Executive Summary
Lens filtration is one of the few cinematography decisions that genuinely cannot be undone in post. Diffusion shapes highlight bloom and skin texture. Neutral density filters preserve aperture and shutter discipline in any light. Polarizers strip reflections and deepen color in ways no grade can replicate. Color-temperature filters adjust the balance of light at the moment of capture. Each tool brings a matching set of artifacts (cross-polarization, vignetting, color shift, flare, sharpness loss) that punish casual use. This guide breaks down what each filter category actually does, where it earns its place on a shot list, and how to document and test it so the colorist inherits intent rather than mystery.
Table of Contents
1. The Art of Diffusion: Shaping Texture and Softening Reality
---
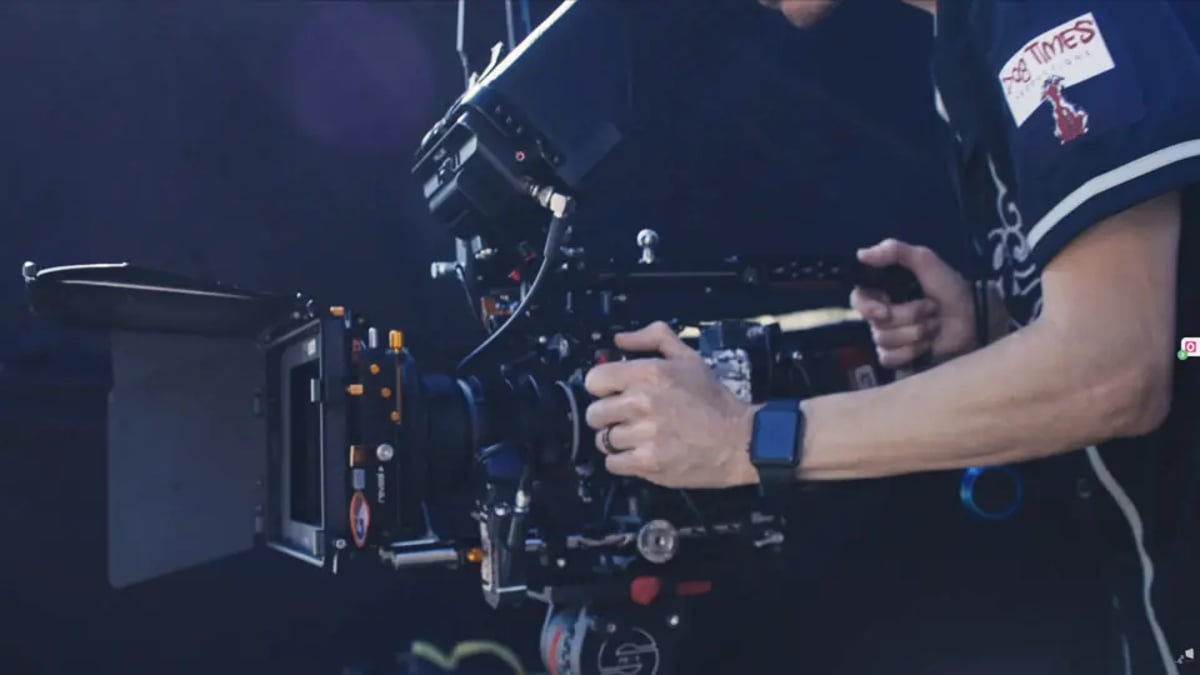
Effective lens filtration is a cornerstone of advanced cinematography, offering DPs precise control over light, texture, and mood long before an image ever reaches post-production. It is an art and a science, demanding a deep understanding of optics, light physics, and the specific aesthetic goals of a project. This guide covers the practical applications and technical considerations of diffusion, neutral density (ND), and polarization filters, alongside strategies for managing the artifacts they can introduce. For the complete overview of the entire process, see our Cinematography Pipeline Guide: From Camera Tests to Deliverables.
Filtration, when used judiciously, allows cinematographers to shape the raw image captured by the lens, influencing everything from dynamic range and depth of field to character portrayal and scene atmosphere. Masters like Roger Deakins ASC, BSC, known for his pristine, naturalistic images, often employ subtle filtration to enhance mood or manage contrast, while Vittorio Storaro ASC, AIC, with his painterly approach, might use color and diffusion filters more overtly to craft a specific visual language. The choices made on set with physical filters are often difficult or impossible to replicate digitally, making them an indispensable part of the cinematographer's toolkit. For the lens-side of this conversation, see Lens Selection Mastery: A Complete Guide for Cinematographers.
The Art of Diffusion: Shaping Texture and Softening Reality
Diffusion filters soften the image by scattering light, reducing contrast, smoothing skin tones, and creating a more ethereal or dreamlike quality. Unlike simply defocusing, which blurs the entire image, diffusion works by spreading highlights and reducing the sharpness of edges, often without dramatically reducing measurable resolution, though fine micro-detail and edge contrast are always softened to some degree. The choice of diffusion filter depends heavily on the desired aesthetic, the specific light sources, and the subject matter.
Diffusion filters come in various strengths and types, each with a distinct optical effect. Classic types include nets, often stretched behind the lens or in front of it, which create a subtle halation around highlights and a gentle softening. More modern glass filters, like the Tiffen Black Pro-Mist or Schneider Classic Soft, incorporate microscopic particles or etched patterns to achieve their effect. Black Pro-Mist filters, for example, are renowned for their ability to soften contrast and create a pleasing halation around practical lights and bright sources, while maintaining deep blacks. A similar visual signature is often associated with high-end productions such as 'Blade Runner 2049,' where diffusion is widely understood to play a role in the atmospheric, neon-soaked aesthetic, allowing light sources to bloom subtly without blowing out, consistent with how this category of filter is typically deployed.
The choice of diffusion can significantly influence how an audience perceives a character or a scene, making it a powerful storytelling tool.
The strength of diffusion is critical. A light diffusion (e.g., 1/8 or 1/4) might be used to gently soften a close-up, making skin appear more flattering, while a heavier grade (e.g., 1 or 2) could be employed to create a distinct stylistic choice, such as the dreamy quality in a flashback sequence. Over-diffusion can lead to a milky, low-contrast image that lacks punch, while under-diffusion might not achieve the desired softening effect. It is essential to test different strengths with specific lenses and lighting conditions. For guidance on protecting image quality through the rest of the pipeline, review Building a LUT Pipeline: Show LUTs, CDLs, and Governance.
Diffusion also interacts with light sources. A strong point light source will exhibit more pronounced halation with a diffusion filter than a broad, soft source. This interaction can be leveraged to create specific visual effects, such as enhancing the glow of practical lamps or adding a romantic sheen to backlit hair. However, it also means that filtration decisions must be made in conjunction with lighting design. A filter that looks beautiful with soft, ambient light might create distracting flares or excessive halation with direct, hard light. For the lighting decisions that surround these choices, see Lighting & Grip Masterclass: Prelight Strategy to Set Execution.
Pro Tip:
Neutral Density (ND) Filters: Controlling Exposure and Motion Blur
Neutral Density (ND) filters are essential tools for managing exposure, allowing cinematographers to maintain specific aperture and shutter speed settings regardless of ambient light levels. Their primary function is to reduce the amount of light entering the lens without altering the color or contrast of the image. This "neutral" light reduction is crucial for creative control, particularly in bright outdoor environments.
The need for ND filters often arises from two key cinematographic principles: depth of field and motion blur. To achieve a shallow depth of field (e.g., to isolate a subject from the background), a cinematographer might choose a wide aperture (low f-number). In bright daylight, this wide aperture would lead to overexposure. An ND filter reduces the light, allowing the wide aperture to be used while maintaining correct exposure. Similarly, maintaining a filmic motion blur often requires a specific shutter speed, typically adhering to the 180-degree shutter rule (e.g., 1/48th of a second for 24fps).
In bright conditions, this slow shutter speed would again result in overexposure. ND filters enable the use of preferred shutter speeds without compromising exposure.
ND filters are categorized by their optical density, which corresponds to a specific number of stops of light reduction. Common densities range from ND.3 (1 stop) to ND2.1 (7 stops) or higher. They are available as solid filters, which provide a uniform reduction across the entire frame, or as graduated ND (GND) filters, which have a darker top half that gradually transitions to clear at the bottom. GNDs are invaluable for balancing exposure between a bright sky and a darker foreground, a common scenario in landscape cinematography or exteriors. However, their use requires careful consideration, as a visible transition line can be distracting if not positioned correctly, especially with moving subjects or cameras.
Variable ND (VND) filters offer a convenient alternative, particularly for video work where lighting conditions can change rapidly. These filters consist of two polarizing elements that rotate against each other, allowing for adjustable light reduction. Typical consumer-pro VNDs cover roughly 1-5 stops (ND2-ND32), while modular systems can extend total density into the 6-9 stop range (e.g., ND64-ND512), useful for extreme daylight long-exposure effects like smoothing waterfalls or removing pedestrians from busy scenes. High-quality VNDs, such as the B+W XS-Pro Digital ND Vario MRC Nano, feature multi-resistant coatings to minimize ghosting and reflections, ensuring image integrity.
PolarPro's Variable ND (Peter McKinnon Edition) is an example of a VND engineered with hard stops at minimum and maximum settings to help avoid common artifacts like cross-polarization, including on wide-angle lenses down to roughly 16mm full-frame focal lengths.
Pro Tip:
💡 When using VND filters, be aware of potential color shifts, especially with cheaper models or at higher densities. Always perform camera tests with your specific VND to understand its impact on color rendition. High-quality VNDs are designed to be as color-neutral as possible, but slight shifts can still occur, which should be accounted for in your color pipeline, as discussed in Building a LUT Pipeline.Polarization Filters: Taming Reflections and Enhancing Color
Polarization filters are unique in their ability to selectively block light waves based on their oscillation direction. This property makes them invaluable for reducing reflections, deepening sky colors, and increasing saturation without affecting the color balance of the scene. They are particularly effective in outdoor shooting environments or where reflective surfaces are present.
A polarizing filter works by allowing only light waves oscillating in a specific plane to pass through. Light reflecting off non-metallic surfaces (like water, glass, or polished wood) often becomes partially polarized. By rotating the polarizer, a cinematographer can align its plane to block these reflected light waves, effectively "seeing through" reflections. For example, a polarizer can be used to reduce glare on car windshields, reveal details beneath the surface of water, or minimize reflections on paintings in a museum. This effect is impossible to achieve in post-production, as the information lost to reflection is simply not captured by the sensor.
Beyond reflection control, polarizers deepen the blues of the sky and enhance the saturation of colors. When light from the sky is partially polarized, a polarizer can block some of the scattered light, making the sky appear richer and more vibrant. This effect is most pronounced when shooting at roughly a 90-degree angle to the sun, particularly across broad skies with wide-angle lenses. Foliage can appear more saturated and less shiny when reflections from its waxy surfaces are reduced. This subtle enhancement of natural colors can contribute significantly to the visual richness of a scene.
The use of a polarizer does come with considerations. Most circular polarizers reduce light transmission by roughly 1.3 to 1.5 stops in real-world use (sometimes quoted as a broader 1-2 stop range), which must be accounted for in exposure. When using a variable ND filter, which often incorporates polarizing elements, this light reduction is already factored into its density rating. However, stacking a separate polarizer with other filters can lead to additional light loss. With wide-angle lenses, the effect of a polarizer can also be uneven across the frame, leading to an artificially dark band in the sky, most noticeable when shooting broad skies with wide-angle lenses oriented near a 90-degree angle to the sun. This occurs because the angle of polarization changes across the wide field of view, causing different parts of the sky to be polarized differently.
Cinematographers like Emmanuel Lubezki ASC, AMC, known for his wide-angle work, carefully consider the angle of the sun and the composition to maximize the effect of polarization without introducing distracting artifacts.
Pro Tip:
💡 When using a polarizer to reduce reflections on glass, experiment by rotating the filter. The effect will be most pronounced when the filter is oriented correctly to block the polarized reflections. Keep an eye on the monitor to ensure the effect is even and desirable across the frame, especially with wide lenses.Color Temperature Filters: Correcting and Creative Shifting
While modern digital cameras offer extensive white balance controls and color correction in post-production, physical color temperature filters still play a vital role in cinematography, particularly for achieving accurate color rendition on set and for creative color shifts that are difficult to replicate digitally with the same fidelity. These filters are designed to adjust the color temperature of light entering the lens, either warming or cooling the image.
Color temperature is measured in Kelvin (K). Lower Kelvin values (e.g., 2000K-3200K) represent warmer, more orange light, typical of tungsten bulbs or candlelight. Higher Kelvin values (e.g., 5600K-6500K) represent cooler, bluer light, typical of daylight or flash. Color temperature filters, often referred to as CTO (Color Temperature Orange) for warming or CTB (Color Temperature Blue) for cooling, are used to either match different light sources or to intentionally shift the color balance for creative effect.
For instance, if shooting an interior scene lit by warm tungsten practicals but also receiving daylight spill from a window, a cinematographer might gel the window with CTB to cool the daylight to match the tungsten, or gel the practicals with CTO to warm them further, depending on the desired look. Filters can also be used on the lens itself. Some cinematographers employ a slight warming filter on the lens to add a subtle, flattering warmth to skin tones, though others prefer to achieve warmth entirely through lighting and gels rather than at the front of the lens. This contrasts with the often clinical neutrality that can result from purely digital white balancing.
Software-based solutions, including DxO Nik 9 Color Efex and other post-production tools that can simulate color-filter effects, can digitally approximate filter looks. Applying them optically at the point of capture, however, offers certain advantages. Optical filtration interacts directly with the light before it hits the sensor, often resulting in a more organic and nuanced effect, particularly with subtle warming or cooling. It also provides a more accurate reference for the colorist in post-production, ensuring the intended color palette is established from the beginning of the pipeline. However, it requires careful planning and testing during pre-production.
Understanding the role of filtration in shaping the final image is crucial for managing tone and consistency, a topic explored further in Managing Tone: Keeping Performance, Camera, and Edit Consistent.
Pro Tip:
💡 When using color temperature filters, always check your camera's white balance setting. If you're using a warming filter on the lens for a creative effect, you might still want to white balance to a neutral reference in the scene, allowing the filter's effect to be consistently applied across all shots. Conversely, if you're using a filter to correct for a dominant color cast in the light, white balance after the filter is in place.Artifact Management: Recognizing and Mitigating Unwanted Effects
While filters are powerful tools, they are not without their potential downsides. Every piece of glass or plastic placed in front of the lens introduces optical complexities that can manifest as artifacts if not managed correctly. Recognizing these artifacts and implementing strategies to mitigate them is a critical skill for any cinematographer.
One of the most common artifacts, particularly with variable ND filters, is cross-polarization, which appears as an "X" shaped dark shadow in the image, especially at higher densities or with wide-angle lenses. This occurs because the two polarizing elements within the VND are misaligned or pushed beyond their effective range. High-quality VNDs, like some PolarPro models, are engineered with hard stops to help prevent this artifact. Modular ND systems, which combine a lower-density VND with fixed ND filters, also help bypass this issue by separating the variable and fixed stages of light reduction.
Vignetting is another common issue, where the edges or corners of the frame appear darker than the center. This can be caused by the physical thickness of the filter housing, especially when stacking multiple filters, or by the design of certain filters that are not optimized for wide-angle lenses. Some VNDs are specifically designed with thin frames or optimized optical paths to minimize vignetting, even at wide focal lengths. When using multiple filters, employing a larger filter size (e.g., a 4x5.65 filter in a matte box rather than a screw-on filter) can help reduce vignetting.
Color shift can occur with any filter, but it's particularly noticeable with cheaper ND or VND filters. While high-quality filters are designed to be as color-neutral as possible, subtle shifts towards green, magenta, or blue can still happen, especially at higher densities. This is why thorough camera tests are essential. Shoot a color chart with and without the filter, at various densities, and analyze the results. This allows the colorist to create a custom correction or to incorporate the shift into the show LUT.
Flare and ghosting can also be exacerbated by filters, especially if they are not multi-coated. Each additional glass surface introduces the potential for internal reflections that can cause unwanted flares or ghost images of bright light sources. High-quality filters boast multi-resistant coatings (MRC) that significantly reduce these reflections. Keeping filters meticulously clean is also paramount, as dust, smudges, or scratches will diffract light and create distracting flares.
Finally, loss of sharpness is a concern with any additional optical element. While modern filters are designed with high optical clarity, every filter can subtly degrade the image quality. This is often a trade-off for the creative or exposure control benefits they provide. Cinematographers often choose to remove filters when their effect is not strictly necessary to preserve maximum sharpness, or they select filters known for their minimal impact on resolution. Testing filters with your specific lenses is the only way to accurately assess their impact on sharpness. The importance of meticulous data handling on set, including detailed camera reports, is vital for post-production to understand these choices, as covered in Camera Reports That Help Post: Metadata That Prevents Reconform Pain.
Pro Tip:
💡 Maintain a dedicated filter cleaning kit on set. Use a blower brush to remove dust, followed by lens cleaning solution and a micro-fiber cloth. Never use harsh chemicals or abrasive materials, as they can damage delicate coatings. Clean filters frequently, especially after handling or exposure to the elements.Interface & Handoff Notes
What You Receive (Upstream Inputs)
* Creative Brief/Lookbook: Directives on desired mood, visual texture, and specific stylistic goals that inform filter choices (e.g., "dreamy flashbacks," "gritty realism," "hyper-real saturation").
* Lighting Plan: Information on light sources (natural, artificial, mixed), their color temperatures, and intensity, which dictates the need for ND, color correction, or diffusion.
* Lens Choice: Knowledge of specific lenses being used (e.g., vintage vs. modern, wide-angle vs. telephoto) as this impacts filter compatibility, vignetting risks, and desired optical characteristics.
* Camera Tests: Pre-production tests of various filters with the chosen camera and lenses, providing reference material for post-production.
What You Deliver (Downstream Outputs)
* Filtered Footage: Raw camera files with the intended optical effects baked in.
* Detailed Camera Reports: Crucial metadata documenting every filter used per shot, including type, strength, and any variable settings (e.g., VND density). This is vital for post-production to understand the on-set decisions.
* Filter Test Footage: Reference shots (e.g., color charts, skin tones) with and without filters, aiding colorists in maintaining consistency and correcting for potential color shifts.
* DP Notes/Intent: Written or verbal communication detailing the creative intent behind specific filter choices and how they relate to the overall visual language.
Top 3 Failure Modes for Filtration
2. Unaccounted Optical Artifacts: Failing to test filters adequately, resulting in unwanted vignetting, cross-polarization, or excessive flare that compromises image quality and cannot be easily fixed in post.
3. Inconsistent Application: Varied application of filters across similar shots or scenes without clear creative intent, leading to a disjointed visual aesthetic and continuity problems that are difficult to reconcile in editorial.
Browse This Cluster
- Cinematography Pipeline Guide: From Camera Tests to Deliverables — pillar
Next Steps
Ready to see how this fits into the bigger picture? Start with the complete guide.
📚 Complete Guide: Cinematography Pipeline Guide: From Camera Tests to Deliverables
---
© 2026 BlockReel DAO. All rights reserved. Licensed under CC BY-NC-ND 4.0 • No AI Training. Originally published on BlockReel DAO.