Boom Technique for Dialogue: Angles, Distance, Movement
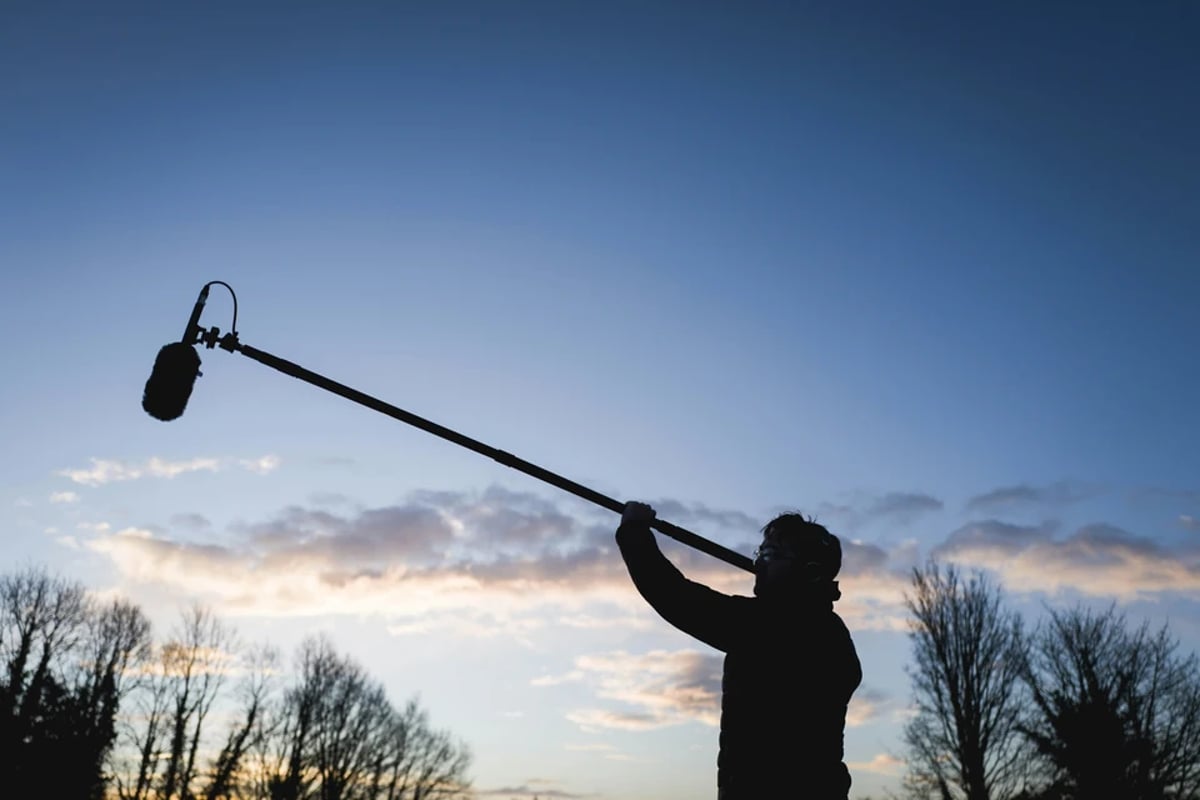
Dialogue is the bedrock of narrative filmmaking, often carrying the emotional and informational weight of a scene. While wireless lavaliers offer convenience and close-miking capabilities, the boom microphone remains the primary tool for capturing natural, room-aware dialogue on set. Mastering boom technique is a nuanced art, requiring an understanding of acoustics, microphone polar patterns, and the choreography of performance. It's not merely about pointing a mic; it's about sculpting sound within the environment, ensuring every word is intelligible, present, and integrates with the visual.
This guide delves into the specifics of boom operation, covering the critical elements of angles, distance, and movement for achieving pristine dialogue. For a comprehensive overview of the entire production sound workflow, see our Full guide: Production Sound Definitive Guide: Set Recording to Editorial Handoff.
Executive Summary
Boom technique is the single biggest variable in production dialogue quality. This guide covers the five core disciplines every boom operator must master: understanding polar patterns and how they shape mic selection, applying the inverse square law to maintain consistent proximity, optimizing overhead and under-boom angles for on-axis capture, executing fluid follow and swing movements during dynamic scenes, and preventing phase issues and shadows through departmental coordination. Equipment selection (mics, poles, mounts, wind protection) and common failure modes round out a complete operational reference.
Table of Contents
1. Understanding Microphone Polar Patterns and Their Application
Understanding Microphone Polar Patterns and Their Application
The foundation of effective booming lies in a thorough understanding of microphone polar patterns. A polar pattern describes a microphone's sensitivity to sounds coming from different directions. For dialogue recording on set, the most commonly employed patterns are cardioid, supercardioid, and hypercardioid, with shotgun microphones (often a type of super or hypercardioid) being particularly prevalent. Each offers distinct advantages and trade-offs that dictate optimal placement and technique.
A cardioid microphone exhibits a heart-shaped pickup pattern, most sensitive to sounds directly in front of it and significantly rejecting sounds from the rear. This pattern offers a relatively wide acceptance angle, making it forgiving for slight movements of an actor or when capturing dialogue from two actors in close proximity. However, its broader pick-up also means it captures more of the ambient room tone and off-axis sounds, which can include unwanted reflections or background noise. For scenes with controlled acoustics and minimal off-screen noise, a cardioid can provide a natural, open sound.
Supercardioid and hypercardioid patterns are more directional than cardioid. They have a tighter pickup lobe at the front, offering increased rejection of sounds from the sides, which is crucial in noisy environments or when isolating a single voice. The trade-off is a small lobe of sensitivity directly at the rear. This rear lobe is less sensitive than the front but can still pick up unwanted sounds if not managed carefully. A hypercardioid is even more directional than a supercardioid, providing maximum rejection from the sides but with a slightly larger rear lobe. Shotgun microphones, characterized by their interference tube design, achieve even greater directionality, making them ideal for isolating dialogue at a greater distance or in acoustically challenging spaces.
Their highly directional nature means precise aiming is paramount; even a slight deviation can result in significant loss of desired sound or an increase in off-axis coloration.
Selecting the appropriate polar pattern depends on the acoustic environment, the distance to the subject, and the desired isolation. In a quiet, well-treated interior, a supercardioid might offer a pleasant balance of isolation and natural room sound. For a noisy exterior or a large, reverberant interior, a shotgun microphone becomes indispensable for its ability to focus on the dialogue source and reject extraneous noise. Boom operators must internalize these patterns, not just as abstract concepts, but as practical tools that inform every decision about microphone choice and placement. The goal is always to maximize the signal-to-noise ratio: getting the microphone as close as possible to the sound source while keeping it out of frame, and using its directional characteristics to minimize unwanted sounds.
Understanding the nuances of these patterns allows a boom operator to anticipate potential issues and actively shape the sonic landscape of a scene.
The Inverse Square Law and Optimal Boom Distance
The inverse square law is a fundamental principle in acoustics that dictates how sound intensity diminishes with distance. Simply put, for every doubling of the distance from a sound source, the sound pressure level (SPL) drops by approximately 6 decibels (dB). This exponential decay means that even small differences in microphone distance can have profound effects on dialogue clarity, presence, and the ratio of direct sound to reverberant sound. For a boom operator, this law is not theoretical; it's the constant battle against distance.
The primary objective is to position the microphone as close to the actor's mouth as possible without entering the frame. This proximity achieves several critical goals: it maximizes the direct sound from the actor, minimizes the pickup of ambient noise and room reverberation, and improves the signal-to-noise ratio. A microphone placed too far away will capture more of the room's acoustics, making dialogue sound distant, hollow, and often less intelligible, leading to increased work in post-production for dialogue editors who attempt to salvage the performance.
Often, production sound mixers and boom operators aim for a distance of 18 to 30 inches (45 to 75 cm) from the actor's mouth. This range is a common starting point, but it is always adjusted based on the microphone's polar pattern, the acoustic environment, and the actor's vocal projection. A highly directional shotgun microphone might perform well at the upper end of this range, especially in open exteriors, while a supercardioid in a quiet interior might require closer placement for optimal presence. When facing challenging acoustic spaces, like hard-surfaced rooms that generate excessive echo, getting the microphone even closer becomes paramount to capture as much direct sound as possible before reflections become dominant.
💡 Pro Tip: When working in challenging acoustic environments, prioritize proximity over perfect angle initially. Getting the mic closer will always yield a better direct-to-reverberant ratio, which is harder to fix in post than a slightly off-axis tone.
The boom operator constantly balances the demands of the camera department (keeping the mic out of frame) with the needs of the sound department (getting the mic close enough). This often involves dynamic repositioning throughout a take as actors move, camera angles shift, or lighting changes. A skilled boom operator can maintain a consistent distance even as the scene evolves, ensuring uniform dialogue levels and character presence. This consistent distance is crucial for maintaining sonic continuity across edits. Dialogue that fluctuates wildly in presence from one shot to another is jarring and pulls the audience out of the story.
The inverse square law underscores why "getting it right on set" is not just a preference but a fundamental requirement for high-quality production sound.
Optimizing Boom Angles for Dialogue Capture
Achieving optimal dialogue clarity involves more than just distance; the angle at which the microphone approaches the sound source is equally critical. The goal is to aim the microphone's primary axis of sensitivity directly at the actor's mouth, or slightly below it, to capture the most direct and uncolored sound. This also helps to naturally reject sounds from less desirable directions, such as footsteps, rustling clothes, or overhead lighting fixtures.
The most common booming technique involves positioning the microphone from above the actor, pointing downwards towards their mouth. This "overhead" approach leverages gravity to keep the boom pole stable and allows the microphone to be lowered into the tightest possible space above the frame line. It also naturally places the microphone's null points (areas of least sensitivity) towards the floor, which can help mitigate unwanted reflections or footfall noise. However, lighting often poses a significant challenge from above, as the boom pole or microphone can cast shadows. The boom operator must work in close coordination with the lighting department, often adjusting their position or angle to avoid shadows while still maintaining optimal sound.
Alternatively, booming from below the actor, pointing upwards, is sometimes necessary. This "under-booming" technique is typically employed when overhead placement is impossible due to restrictive ceilings, complex lighting grids, or extreme wide shots where the boom would always be in frame from above. While it avoids overhead shadows, under-booming presents its own set of challenges: the microphone is now pointing towards the ceiling, potentially picking up more room reverberation from above, and the operator must contend with chest and clothing rustle. The angle from below can also alter the perceived timbre of the voice, sometimes making it sound less natural or "chesty" if not carefully managed.
When under-booming, pointing the microphone slightly upwards towards the actor's mouth, typically aiming at the chin or lower jaw rather than the sternum, can help maintain natural vocal presence while minimizing chest resonance and breath noise.
Regardless of whether booming from above or below, maintaining the microphone on-axis to the actor's mouth is paramount. Off-axis pickup, where the microphone is not directly pointed at the sound source, can introduce frequency coloration, making voices sound muffled, thin, or unnatural. This is particularly true for highly directional microphones like shotguns, which exhibit significant off-axis coloration. A slight shift in angle can drastically change the perceived sound quality.
💡 Pro Tip: When booming multiple actors, prioritize the actor who is speaking or about to speak. Learn to anticipate dialogue cues and smoothly transition the boom's focus. This requires intense concentration and often involves reading scripts and rehearsing with actors.
Experienced boom operators develop an intuitive sense of angle and distance, often relying on visual cues and their trained ear. They can adjust the angle of the microphone on the pole itself, or the angle of the pole relative to the actor, to fine-tune the pickup. This constant micro-adjustment ensures that despite the dynamic nature of a film set, the dialogue remains consistent in tone and presence, a testament to the boom operator's skill and coordination. Effective angling is not static; it is a dynamic dance, adapting to the scene's blocking, camera movement, and lighting design.
Dynamic Boom Movement and Follow Techniques
Dialogue in film is rarely static. Actors move, turn their heads, and deliver lines with varying intensity. The boom operator's role is to capture this dynamic performance with consistent sonic quality, which necessitates precise and fluid movement of the boom pole. This is where the craft truly shines, transforming a stationary microphone into a responsive, integral part of the storytelling.
The most fundamental movement technique is "following" the actor. As an actor delivers lines and moves within their mark, the boom operator must smoothly track their head movements, keeping the microphone pointed at their mouth and maintaining optimal distance. This requires anticipation, often memorizing blocking and dialogue cues, much like a camera operator follows an actor with a lens. The movement should be deliberate and silent, avoiding any creaks or wobbles from the boom pole itself. Shock mounts are crucial for isolating the microphone from handling noise, but a shaky boom operator can still introduce unwanted movement sounds.
When multiple actors are speaking, the boom operator must "swing" or "arc" the boom between them. This technique involves smoothly transitioning the microphone from one actor to another as dialogue shifts. The challenge is to swing the microphone quickly enough to catch the start of a line, but gently enough to avoid abrupt changes in sound or distracting movement. Predictive booming, where the operator anticipates who will speak next based on the script or rehearsal, is key. Sometimes, this means subtly favoring an actor who is about to deliver a critical line, even before they begin speaking.
💡 Pro Tip: Practice "soft swings." When transitioning between actors, let the microphone pass through the neutral space between them rather than snapping directly from one to the other. This creates a smoother sonic transition and gives post-production more usable sound.
"Feathering" is another nuanced technique, particularly useful when an actor's vocal projection changes or when they move closer to or further from the microphone. It involves slight, subtle adjustments to the microphone's distance or angle to maintain consistent levels and presence. For instance, if an actor suddenly speaks louder, the boom operator might slightly pull back the microphone to avoid clipping, or if they turn their head slightly off-axis, a small angle adjustment can bring them back into the prime pickup pattern.
Boom operators often use their entire body to control the pole, not just their arms. A stable stance, core engagement, and smooth weight shifts contribute to precise and silent movement. They also learn to "ride" the camera, understanding its movements and focal length to stay out of frame. For instance, in a wide shot, the boom might need to be higher and further away, while in a close-up, it can be brought in much tighter. This coordination with the camera department is paramount; a boom operator must be aware of the "frame line" at all times, which can shift with lens changes, camera movement, or even slight tilts.
The ability to move the boom silently, precisely, and responsively is a hallmark of a skilled professional, ensuring that the dialogue captured is vibrant, consistent, and free from distractions.
Avoiding Phase Issues and Boom Shadows
Two critical pitfalls that a boom operator must actively prevent are phase issues and boom shadows. Both can severely compromise the quality of the recorded dialogue and necessitate time-consuming, often imperfect, fixes in post-production.
Phase issues typically arise when a sound source is picked up by multiple microphones at slightly different times, causing certain frequencies to cancel each other out or to be boosted unnaturally. On set, this most commonly occurs when a boom microphone is used in conjunction with a lavalier microphone on the same actor. Since the lavalier is typically close to the actor's chest and the boom mic is higher and further away, the sound waves reach each microphone at different instances. This time difference, even if tiny, can lead to comb filtering effects, where the combined sound exhibits a hollow, thin, or metallic quality. For a deeper look at how these tracks are cleaned and matched in post, see our Dialogue Editing Workflow: Cleaning, Matching, and Continuity guide.
To mitigate this, sound mixers often employ techniques such as phase inversion on one of the microphones or careful delay compensation in post-production. However, the first line of defense is proper boom placement and understanding. The boom operator should strive for a primary dialogue track that is as clean and usable as possible, minimizing the need for extensive blending with lavaliers. Sometimes, it's about choosing which microphone captures the superior sound for a particular line or scene, rather than relying on a blend.
Boom shadows are a purely visual problem, but one that falls squarely on the boom operator's shoulders. The boom pole, microphone, or even the operator's body can cast shadows onto the set, actors, or critical elements within the frame. These shadows are often dynamic, moving with the boom pole and creating distracting artifacts that are extremely difficult, if not impossible, to remove in post-production. Avoiding boom shadows requires constant vigilance and close collaboration with the lighting and camera departments.
The boom operator must be acutely aware of the light sources on set (practical lights, production lighting, and natural light) and their direction. Before a take, after the camera has framed up and lights are set, the boom operator should "swing" the boom through its intended path, observing the monitor for any shadows. Often, this involves adjusting the angle of the boom pole, changing the operator's position, or even asking the lighting department for minor adjustments to a light fixture. Sometimes, the solution is to "flag" a light, using a piece of black fabric or a cutter to block the light from hitting the boom pole, thus preventing a shadow.
The boom operator may also need to adjust their height or angle of approach, perhaps booming from a slightly different side or even transitioning to under-booming if an overhead light source is particularly problematic. This constant negotiation between sound and light is a testament to the collaborative nature of filmmaking. A good boom operator is a silent, almost invisible, dancer within the frame, ensuring sonic clarity without leaving a visual trace.
Equipment Selection: Mics, Poles, and Mounts
The effectiveness of boom technique is inextricably linked to the quality and suitability of the equipment used. The choice of microphone, boom pole, and shock mount forms the essential toolkit for any boom operator, each component playing a vital role in capturing clean, professional dialogue.
Microphones: As discussed, the choice of microphone polar pattern is paramount. Shotgun microphones, such as the Sennheiser MKH 416, Schoeps CMIT 5U, or DPA 4017, are industry standards for their excellent directionality and low self-noise, making them ideal for exterior and reverberant interior locations. For quieter interiors or when a slightly wider pickup is desired, supercardioid condenser microphones like the Schoeps CMC641 or DPA 4018 are highly favored for their natural sound reproduction and minimal off-axis coloration. The specific acoustic properties of the location and the desired sonic texture will guide the selection.
A production sound mixer will often have a selection of these microphones available to adapt to varying circumstances.
Boom Poles: A boom pole is more than just a stick; it's a precision instrument. Modern boom poles are typically made from lightweight yet rigid materials like carbon fiber or aluminum, allowing operators to extend them to considerable lengths (often 10-15 feet or more) without excessive fatigue or sag. Key features to consider include their weight, rigidity (to prevent flex and unwanted noise), and the quality of their locking mechanisms. Quick, secure locks are essential for rapid adjustments during takes. Internal cabling, where the microphone cable runs inside the pole, is also highly desirable as it eliminates cable noise from rubbing against the pole and keeps the setup tidy.
Brands like K-Tek and Ambient Recording are well-regarded for their robust and ergonomic boom poles.
Shock Mounts: A shock mount is a crucial accessory that isolates the microphone from mechanical vibrations transmitted through the boom pole. Without a shock mount, any handling noise from the operator (grip changes, pole adjustments, even footsteps on the ground) would be directly transferred to the microphone, rendering the dialogue unusable. Shock mounts use elastic suspensions, rubber bands, or specialized internal dampening systems to decouple the microphone from the pole. Rycote is a leading manufacturer of high-quality shock mounts and wind protection systems, often combining both into a "zeppelin" or "blimp" for exterior use, which further protects the microphone from wind noise and plosives.
The effectiveness of a shock mount directly impacts the cleanliness of the recorded sound, allowing the boom operator to focus on positioning rather than worrying about handling noise.
Wind Protection: For exterior shoots, wind protection is non-negotiable. Even a slight breeze can create rumble and buffeting noise in a microphone. Wind protection comes in various forms: foam windscreens for light breezes, basket-style "blimps" or "zeppelins" with internal shock mounts for moderate wind, and furry "dead cats" or "windjammers" that fit over blimps for heavy wind conditions. The choice depends on the severity of the wind and the desired level of protection. Over-protection can sometimes slightly muffle the sound, so a balance must be struck.
The careful selection and maintenance of this equipment are fundamental. A high-quality microphone paired with a flimsy pole or an inadequate shock mount will still yield poor results. Conversely, top-tier equipment in the hands of an unskilled operator will not magically produce excellent sound. It is the interplay between the operator's skill and appropriate tools that ultimately defines the quality of the captured dialogue.
Common Mistakes to Avoid
Boom operating, while deceptively simple in concept, is fraught with potential errors that can derail a production's sound.
* Entering the Frame: The cardinal sin. Any part of the boom pole or microphone visible in the shot is a costly error. This often leads to ruined takes, requiring reshoots or extensive visual effects work. Constant monitoring of the camera's frame line is essential.
* Casting Shadows: As discussed, boom shadows are visually distracting and difficult to remove. This often happens in close-up shots where the boom is tight to the actor, or when working with hard, directional light sources.
* Inconsistent Distance/Angle: Fluctuating distance or angle to the actor's mouth results in dialogue that sounds inconsistent in presence, level, and tone across a take or between cuts. This lack of continuity is jarring for the audience.
* Handling Noise: Any noise transferred from the operator's hands, clothing, or movement through the boom pole to the microphone. This can sound like creaks, thumps, or rustles and indicates poor boom pole handling or an inadequate shock mount.
* Off-Axis Pickup: Not aiming the microphone directly at the actor's mouth, leading to colored, muffled, or thin dialogue, especially with directional microphones.
* Ignoring the Environment: Failing to account for ambient noise, room acoustics, or potential sound hazards (e.g., HVAC units, buzzing lights, traffic) that the boom mic will pick up. A good boom operator is always listening to the room, not just the dialogue.
* Poor Coordination with Camera/Lighting: Not communicating with other departments about frame lines, lighting setups, or actor blocking. This leads to conflicts and compromises in sound quality.
Interface and Handoff Notes
What you receive (upstream inputs):
* Camera Frame Lines and Lens Choices: Dictate the physical space the boom can occupy.
* Lighting Setup: Crucial for identifying potential shadow conflicts.
* Timecode Feed: Ensures synchronization with other production elements.
* Director's and Actor's Intent: Informs the desired tone and emphasis of dialogue.
What you deliver (downstream outputs): * Clean, Intelligible Dialogue Tracks: The primary output, featuring optimal signal-to-noise ratio and consistent levels.
* Boom-Specific Tracks: Often recorded as a separate track on the mixer/recorder, clearly labeled.
* Production Sound Report Notes: Detailing any issues, mic choices, or specific instructions for post-production related to boom tracks.
Top 3 failure modes for THIS specific topic:
2. Boom in Shot or Boom Shadow: Visual errors that compromise the image, leading to costly reshoots or extensive VFX work.
3. Inconsistent Dialogue Presence/Tone: Fluctuations in microphone distance or angle lead to dialogue that sounds different from line to line or shot to shot, creating continuity errors in the edit.
Browse This Cluster
- Production Sound Definitive Guide: Set Recording to Editorial Handoff
Next Steps
Ready to see how this fits into the bigger picture? Start with the complete guide.
📚 Complete Guide: Production Sound Definitive Guide: Set Recording to Editorial Handoff
---
© 2026 BlockReel DAO. All rights reserved. Licensed under CC BY-NC-ND 4.0 • No AI Training. Originally published on BlockReel DAO.