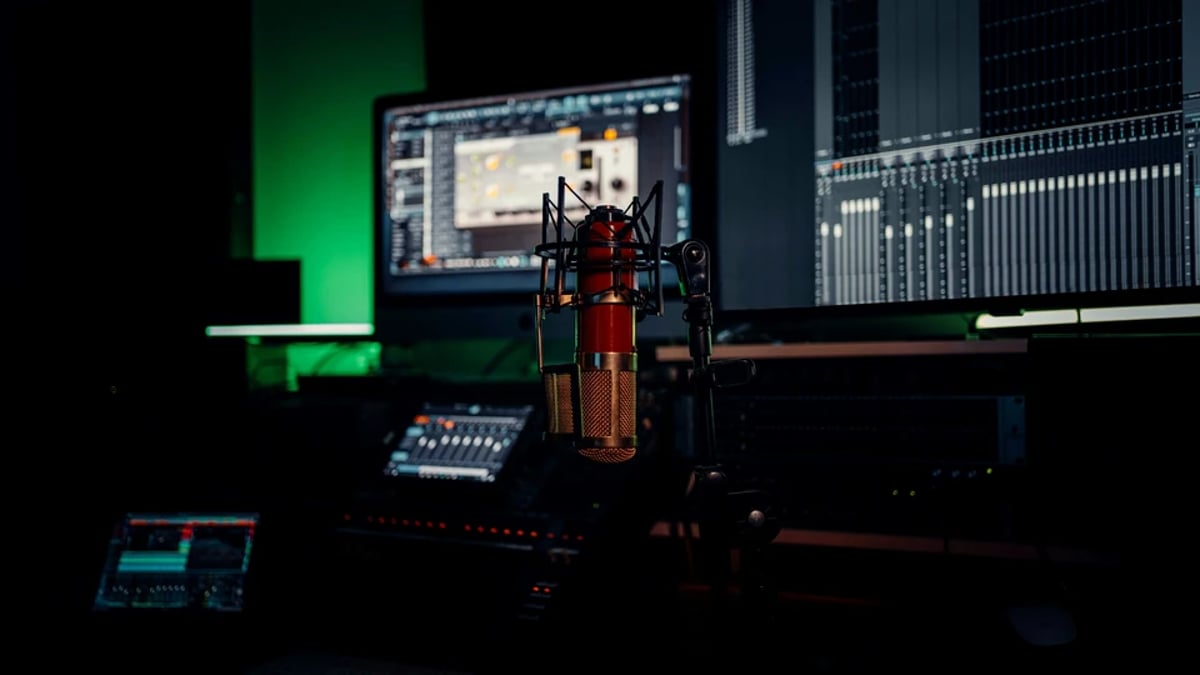
Audio QC Guide: Phase, Sync, Distortion, Dialogue
The journey of a film's audio from production sound to final master is complex, demanding meticulous attention at every stage. The ultimate gatekeeper for sound quality and technical compliance is the Quality Control (QC) process. This focused guide covers the four pillars of audio QC (phase, sync, distortion, and dialogue intelligibility), with actionable steps to make sure your audio passes spec and lands with clarity on every screen.
Part of the full Masterclass: Deliverables & Archiving Masterclass: Mastering, Localization, and LTO
Executive Summary
Audio QC failure is the single most common reason streamers and broadcasters bounce a delivery. Loudness overs, true-peak clips, sync drift, and unintelligible dialogue cause more rejections than any creative note. This guide gives you a working checklist for the four pillars (phase, sync, distortion, intelligibility), the standards each platform measures against (ITU-R BS.1770, EBU R 128, ATSC A/85, Netflix and Amazon delivery specs), the meters and restoration tools the post audio community actually uses (Nugen VisLM, iZotope Insight and RX, Sound Radix Auto-Align, Cedar DNS, Minnetonka AudioTools FOCUS), and the QC discipline that keeps a master clean from production through archive.
Who this is for: post-production sound mixers, dialogue editors, picture editors handling temp mixes, indie filmmakers self-delivering to platforms, and producers signing off on final masters.
What you will be able to do after reading:
1. Build a layered QC workflow that catches issues before delivery, not after.
Table of Contents
1. Building a Professional Audio QC Workflow for Deliverables
Building a Professional Audio QC Workflow for Deliverables
Effective audio QC is not a last-minute check; it is an iterative process integrated throughout post-production, culminating in a thorough validation against specific delivery specifications. Every broadcaster, streamer, and distributor, from Netflix to Amazon, has a unique set of technical requirements for audio, dictating everything from loudness levels to channel layouts and file formats. A professional QC workflow begins by translating these technical specifications into a precise checklist.
A common requirement across platforms is loudness, typically measured in LUFS/LKFS using ITU‑R BS.1770 algorithms, often wrapped in regional standards like EBU R 128 for Europe or ATSC A/85 for North America. Crucially, true peak limits (commonly −2.0 dBTP for Netflix and many streamers, −1.0 dBTP for broadcast under ATSC A/85) must be verified with true-peak meters that apply oversampling, as specified by ITU‑R BS.1770. Additionally, channel order/layout (e.g., the standard 5.1 ordering of L, R, C, LFE, Ls, Rs) and file formats (typically 24-bit/48 kHz WAV, with some platforms accepting 24-bit/96 kHz for archival masters) are non-negotiable.
Major post-production facilities often employ a layered QC approach. This typically involves:
2. Technical listening pass: A dedicated audio engineer listens on calibrated monitors or headphones, focusing on technical flaws.
3. Creative pass: This pass assesses subjective elements like dialogue intelligibility, overall balance, and emotional impact.
4. Spot QC of deliverables: Once the final audio files are bounced or encoded, a spot check ensures no new issues were introduced during the render process.
Central to any professional QC environment is monitor chain calibration. Audio rooms for film mixing are calibrated to 85 dB SPL C-weighted per channel for theatrical rooms (per SMPTE RP 200 and Dolby reference), with near-field rooms for TV and streaming often referenced lower (around 79 dB SPL C-weighted, the Dolby Atmos Home reference). Verifying speaker placement and phase before any subjective listening decisions are made is crucial for accurate assessment of phase, distortion, and intelligibility.
Tools for this process include loudness and peak meters like Nugen Audio VisLM, iZotope Insight, and Waves WLM Plus. For immersive audio, the Dolby Atmos Production Suite provides comprehensive metering. DAWs like Avid Pro Tools Ultimate, Steinberg Nuendo, Adobe Audition, Fairlight in DaVinci Resolve, and Apple Logic Pro are commonly used for QC, offering deep environments for detailed audio analysis. Logic Pro, for instance, allows for simultaneous export of Dolby Atmos MP4 and ADM BWF deliverables, streamlining the final stage.
💡 Pro Tip: Maintain a library of QC presets in your loudness and QC tools. Label them clearly (e.g., "Netflix 5.1," "BBC R128," "US Broadcast A/85") to align with specific client specifications. This minimizes errors and ensures consistency, especially when multiple team members are involved in the QC process.
Common mistakes in this phase include treating QC as a one-time final check rather than an ongoing process. Mixing to "what sounds good" on consumer speakers without calibrated monitoring often leads to delivery failures. Another pitfall is not aligning sample rate or bit depth between the project and deliverables, such as mixing 44.1 kHz music into a 48 kHz video timeline without proper sample rate conversion (SRC). Relying solely on loudness meters and neglecting subjective intelligibility or artistic balance is also a frequent error.
Phase & Polarity QC: Stereo, Multichannel, and Mono Compatibility
Phase and polarity issues can subtly (or not so subtly) degrade audio quality, leading to thin or hollow sounds, disappearing elements, and a compromised stereo or multichannel image. Understanding the difference between polarity and phase is fundamental. Polarity inversion is a simple 180° flip of the waveform, easily corrected with a "phase invert" button in most DAWs. Phase issues, however, typically arise from timing differences between multiple microphones (e.g., a boom mic and a lavalier mic on the same actor) or channels. These timing discrepancies cause frequency cancellations (comb filtering), resulting in a hollow or unnatural sound.
A critical aspect of QC for phase is mono compatibility. Many broadcast and streaming specifications still require content to sound acceptable when downmixed to mono or stereo from a surround mix. This means QC must include listening in mono to check for:
Consistent channel layout is another non-negotiable. QC verifies that left and right channels are not swapped and that 5.1, 7.1, or Atmos beds adhere strictly to the delivery specification's channel order. Mis-ordered channels are a frequent and easily avoidable QC failure point.
Tools for detecting phase problems include phase correlation meters and vectorscopes, often built into DAWs like Nuendo, Pro Tools, Logic Pro, and Adobe Audition. Dedicated plugins such as Waves PAZ Analyzer, Nugen Visualizer, and iZotope Insight provide visual feedback, displaying phase correlation from -1 (out of phase) to +1 (in phase) and the overall stereo image spread. For correcting phase issues, tools like Sound Radix Auto-Align and Auto-Align Post automatically time-align multi-mic recordings, significantly reducing comb filtering between boom and lavalier microphones. Manual alignment in DAWs using sample-level editing tools is also a common practice.
💡 Pro Tip: When working with dialogue recorded with both a boom and a lavalier, time-align the waveforms first (often the lav will be slightly delayed), then blend the two sources by ear, and finally check mono compatibility. A small adjustment of a few samples can dramatically improve the body and clarity of the dialogue in the final mix.
Common mistakes include only checking mono compatibility at the very end of the mix, leading to the discovery that main dialogue disappears or thins out due to phase cancellation between boom and lav. Misaligned stereo M/S or XY recordings on set, if not corrected, can result in a narrow or unstable stereo image. Incorrect phase when combining room mics with close mics can yield hollow or "phasey" ambience. Swapping L and R channels during export, especially with complex routing, is also a common error. Lock down your export templates and validate them on every project.
To effectively QC phase, especially in multichannel mixes, run downmix simulations (e.g., LtRt, LoRo, stereo, mono) within your DAW. This confirms that phase and polarity integrity are maintained across various real-world playback scenarios.
Sync QC: Keeping Dialogue and Picture in Lockstep
Accurate synchronization between audio and picture is paramount for a believable viewing experience. Sync QC goes beyond a simple spot check at the beginning of a program; it involves verifying alignment at the start, middle, and end to catch drift. Drift can be caused by mismatched frame rates, sample rates, or incorrect pull-ups/pull-downs during post-production.
Standard reference points are crucial for establishing and verifying sync. The 2-pop (a 1 kHz, 1-frame beep at 00:01:00:00) and a corresponding tail pop are traditional markers for film and broadcast deliveries. Beyond these, production sound and picture are initially aligned using timecode or a visual slate, with subsequent verification focusing on lip movements and hard consonants. Broadcasters and streamers typically have strict tolerances for sync errors, often allowing only ±½ frame or ±1 frame. QC must confirm this visually and audibly.
DAWs and NLEs are essential tools for sync verification. Avid Pro Tools Video Engine, DaVinci Resolve/Fairlight, and Adobe Premiere Pro/Audition all support frame-accurate audio-to-picture alignment. Nuendo offers advanced tempo detection and timebase alignment features which, in some complex scenarios, can help align performances not originally recorded to a click.
Visual waveform-based checks are a core QC technique. Zooming into plosives and consonants (like P, B, T, K) and comparing them against lip movements in the picture provides a reliable way to confirm precise sync. Comparing the on-set clap from a slate to the corresponding frame where the clapper closes is another fundamental check. For correcting sync issues, especially with ADR or alternate takes, tools like VocALign (Synchro Arts) and Revoice Pro can align dialogue with high accuracy.
💡 Pro Tip: When performing a sync QC pass, solo the dialogue track and mute music and effects. Focus purely on the mouth region in the picture while scrubbing with audio on. This isolates any sync discrepancies, preventing other elements from masking the issue. Create QC markers at critical dialogue scenes (close-ups, rapid-fire exchanges) to quickly jump to these points for verification in every QC pass.
Common mistakes include mixing footage shot at one frame rate (e.g., 23.976 fps) with audio posted at a true 24 fps or 25 fps project rate, which inevitably causes slow drift over the program's duration. Conforming or re-timing picture without also reconforming the audio will lead to accumulating sync offsets. Ignoring pull-up/pull-down issues when moving between different delivery standards (film, broadcast, streaming) is another frequent source of sync problems. Finally, failing to re-check sync after the final render or encode is risky, as encoding workflows can sometimes introduce unexpected offsets if not correctly configured.
Distortion, Noise, and Artifacts: Finding and Fixing the Hidden Killers
Distortion, unwanted noise, and digital artifacts can render an otherwise well-mixed soundtrack unusable for delivery. Effective QC distinguishes between different types of audio flaws. Recording-stage distortion might stem from overdriven preamps or clipped lavalier/boom mics. Mix-stage distortion can be introduced by plugin overload or bus clipping within the DAW. Finally, codec/encode distortion occurs during the rendering process due to bitrate limitations or overshot true peaks interacting poorly with the encoding algorithm.
A critical QC check involves true peak and inter-sample peaks. Many delivery specifications mandate measuring true peak (not just sample peak) using ITU‑R BS.1770 compliant meters and strictly adhering to limits (e.g., staying below −1 dBTP). Ignoring true peaks can lead to digital overs when the audio is encoded into lossy formats, even if the DAW's peak meters appear clean.
Noise floor and hum checks are also vital. QC engineers listen for low-level hum (50/60 Hz), buzz, HVAC noise, camera noise, RF interference on wireless microphones, and harsh gating artifacts. These issues might be masked in a dense mix but become glaringly obvious on different playback systems or in quieter sections of the film.
Measurement tools like Nugen VisLM, iZotope Insight, Waves WLM Plus, and Dolby Media Meter are indispensable for loudness and true-peak measurement. Most professional DAWs (Pro Tools, Nuendo, Logic, Resolve/Fairlight, Audition) also offer built-in meters with true-peak options and oversampling capabilities. For remediation, restoration suites like iZotope RX (Standard/Advanced) are industry standards, offering modules for de-clip, de-hum, de-click, spectral repair, and ambience matching. Specialized tools like Cedar DNS systems, Accusonus ERA tools, and Waves X-Hum/X-Click/X-Crackle also provide advanced noise reduction.
💡 Pro Tip: Perform at least one QC pass at a lower than mixing volume. If the mix feels brittle, harsh, or fatiguing at moderate listening levels, it often indicates hidden clipping, over-compression, or excessive equalization that might be less obvious at higher volumes. This "whisper test" can reveal subtle issues before they become major problems.
Common mistakes include relying solely on DAW channel meters, which often only display sample peaks, and ignoring crucial true-peak readings. This frequently results in overs after encoding. Aggressively using brickwall limiting to "maximize loudness" can lead to audible pumping and harshness, failing subjective QC even if the numerical loudness values are within spec. Over-processing noise reduction is another common error, creating unnatural "underwater" or metallic artifacts, especially on dialogue. Failing to monitor at lower volumes during QC can mask distortion and harshness that would be apparent to an audience.
For archival masters, it is good practice to save both pre-NR (noise reduction) and post-NR versions of critical stems. This provides flexibility for future engineers to re-treat the material with potentially superior tools that may emerge over time.
Dialogue Intelligibility: Measuring, Mixing, and QC Across Devices
Dialogue intelligibility is arguably the most critical aspect of audio QC, as unclear speech is a primary reason for audience frustration and deliverable rejection. Intelligibility is not simply about loudness; it encompasses a complex interplay of factors: * Signal-to-noise ratio between the voice and any background elements.
* Competing frequency content where music or effects mask the crucial speech frequencies (typically 2 kHz to 5 kHz for consonants).
* Room tone consistency and excessive reverb that can blur words.
Some standards and tools, particularly in broadcast workflows, emphasize dialogue-gated loudness, which focuses specifically on the loudness of speech segments. Enterprise platforms such as Minnetonka AudioTools FOCUS are designed to apply dialogue intelligibility enhancement and loudness processing at scale in file-based workflows, ensuring compliance and clarity.
Professional QC checks dialogue intelligibility across multiple playback scenarios: * Calibrated studio monitors for a neutral reference.
* Nearfield monitors at lower levels to simulate typical home viewing.
* High-quality closed-back headphones to reveal subtle issues. * Sometimes, small consumer speakers or soundbars to mimic real-world audience conditions.
Tools like Nugen LM-Correct and VisLM offer dialogue-based loudness measurement, which can be critical for specific delivery specs. Dialogue enhancement and mixing tools are also key: iZotope RX modules like Dialogue Isolate, Dialogue De-Reverb, and Voice Denoise are industry staples. Cedar DNS systems and Waves Clarity Vx offer advanced noise suppression. Dynamic EQ and multi-band compression, exemplified by FabFilter Pro-Q/Pro-MB or Waves C6, are used to carve out frequency space for dialogue, reducing masking from other elements. The principle behind Dolby Atmos Dialogue Lift (found in some consumer devices) also informs professional mixing, where dialogue is given priority and presence.
💡 Pro Tip: When conducting QC, particularly for dialogue, try the "subtitles off" test. Many engineers (and viewers) subconsciously rely on subtitles during mixing and editing, which can mask underlying intelligibility issues. Forcing yourself to listen without visual aid can highlight moments where dialogue becomes unclear.
Common mistakes in achieving dialogue intelligibility include relying purely on integrated loudness LUFS, which can "measure correctly" even if dialogue is buried by dense music and effects. Mixing on overly "hyped" monitors or headphones can lead to dialogue that sounds under-bright or muffled on neutral playback systems. Overusing reverb or production ambience on crucial lines, especially ADR, frequently makes words harder to distinguish. Inconsistent mic placement and gain staging on set can also leave post-production with an uphill battle, requiring heavy compression and noise reduction that can introduce artifacts.
To maintain consistent dialogue levels, use sidechain compression on the music bus, triggered by the dialogue stem, to subtly duck background elements when characters speak. Prioritize the 2 kHz to 5 kHz frequency band for dialogue clarity, where consonants and sibilance reside. Keeping a reference track of a well-mixed, dialogue-driven film or series in your session can help recalibrate your perception of speech brightness and level during QC. When using restoration tools, start with light dialogue denoise and multiple smaller passes rather than one aggressive pass to preserve intelligibility and naturalness.
Final Deliverables & Archival Masters: Technical QC and Documentation
The final stage of audio QC is the meticulous preparation and validation of deliverables and archival masters. This ensures that all the hard work in phase, sync, distortion, and intelligibility translates into compliant, high-quality files for distribution and long-term preservation.
A comprehensive deliverable list dictates the required outputs. This typically includes: * Full mix in various formats (stereo, 5.1, 7.1, immersive Atmos).
* M&E (Music & Effects) stems, which are crucial for foreign language versions, as they contain all non-dialogue elements. * Individual Dialogue, Music, and FX stems. * Sometimes, multiple configurations of printmasters.
For masters, linear PCM WAV files are the standard, commonly 24-bit/48 kHz for picture deliverables, though higher sampling rates or bit depths are often used for archives. For immersive formats, Dolby Atmos ADM BWF (Audio Definition Model Broadcast Wave Format) and MP4 deliverables are common. DAWs like Apple Logic Pro can export both an MP4 with Dolby Atmos and an ADM BWF master simultaneously, streamlining this complex process.
Archival QC goes beyond immediate delivery. It verifies that archived masters preserve: * Sync and timecode integrity. * Channel layout and crucial metadata (e.g., distinguishing Dolby Atmos bed elements from objects). * Versioning information (e.g., language, censored/uncensored cuts, director's cuts).
Tools like Minnetonka AudioTools are integrated into broadcast workflows for up-conforming, loudness, and QC, and are used by networks to validate various parameters before acceptance. DAWs with mature automation features allow for templated exports of stems and deliverables, minimizing routing errors.
💡 Pro Tip: Create export templates in your DAW for each major client or distributor you work with. Lock down routing, naming conventions, and format settings within these templates. This ensures that stems and full mixes always render correctly and consistently, reducing the risk of human error during the high-pressure final delivery phase.
Metadata and documentation are often overlooked but are critical for long-term archiving and future-proofing. Maintaining cue sheets, stem maps, and detailed version logs (documenting changes between temp mixes, festival cuts, broadcast cuts, etc.) is essential. Embedding BWF metadata (track names, timecode start, description) into WAV files and ensuring correct metadata on ADM files provides vital information for anyone who accesses these assets in the future.
Common mistakes at this stage include delivering only a stereo mix when 5.1 and stereo are required, or failing to provide a complete M&E stem. Incorrect channel order (e.g., a 5.1 mix exported with LFE in the wrong position) is a frequent and immediate QC failure. Mismatched lengths between picture and audio deliverables (extra handles, missing frames, or incorrect 2-pop placement) can cause significant headaches. Perhaps most detrimental is failing to document last-minute fixes; this lack of transparency can severely complicate future remasters or foreign versioning efforts.
Always run a post-render QC on the actual delivery files, not just the DAW session output. This catches any accidental routing, dither, or encoding anomalies introduced during the export process, ensuring that what you deliver is precisely what was intended.
Common Mistakes
* Ignoring Delivery Specs: Mixing to taste without cross-referencing specific loudness, true peak, and channel layout requirements of the target platform.
* Uncalibrated Monitoring: Making critical mixing and QC decisions on uncalibrated speakers or headphones, leading to mixes that don't translate correctly.
* Skipping Mono Compatibility: Failing to check how the mix collapses to mono, potentially losing dialogue or key sound effects due to phase cancellation.
* Over-Processing: Aggressively using noise reduction or limiting, introducing audible artifacts that degrade overall quality.
* Last-Minute Sync Checks: Only checking sync at the beginning or end of the project, missing gradual drift over time.
* Poor Documentation: Not providing clear metadata, stem maps, or version logs, making future re-purposing or archiving difficult.
Interface & Handoff Notes
What you receive (upstream inputs): * Picture Lock EDLs/XMLs: Frame-accurate lists of picture edits.
* Production Sound Files: Organized by scene/take, often with sound reports.
* ADR/Foley/Music Stems: Individual elements from other post-audio departments.
* Reference Video: Often with burnt-in timecode and 2-pop/tail-pop markers.
What you deliver (downstream outputs): * Full Mix Masters: Stereo, 5.1, 7.1, or Atmos ADM BWF files adhering to delivery specs.
* M&E (Music & Effects) Masters: Full mix without dialogue for international versions.
* Dialogue, Music, FX Stems: Individual stems for archiving or future remixing.
* Loudness Reports: Documentation of compliance with target LUFS/LKFS and true peak levels.
Top 3 Failure Modes for Audio QC:
2. Sync Drift: Audio falling out of sync with picture over the duration of the program.
3. Dialogue Intelligibility Issues: Speech being masked, muffled, or distorted, making it difficult for the audience to understand.
Browse This Cluster
Start here (pillar):
Companion QC checklists:
Upstream workflow:
Related operations:
Next Steps
Ready to see how this fits into the bigger picture? Start with the complete guide.
📚 Complete Guide: Deliverables & Archiving Masterclass: Mastering, Localization, and LTO
---
© 2026 BlockReel DAO. All rights reserved. Licensed under CC BY-NC-ND 4.0 • No AI Training. Originally published on BlockReel DAO.