Rolling Shutter Fix Guide: Shoot Clean Motion in 2026
Executive Summary
Rolling shutter is a capture problem first and a post problem second. This guide covers what causes skew, jello, and partial-exposure banding on CMOS sensors, how to pick camera bodies and modes with faster readouts, how to plan shutter angle, frame rate, and movement to hide or eliminate artifacts, how to rig and stabilize to kill high-frequency vibration, and where post tools (Premiere, After Effects, Resolve, Nuke, Fusion) actually help versus where they make things worse. The goal: leave the day with clean plates that track cleanly and cut without visual discontinuity.
Table of Contents
1. Understanding Rolling Shutter and Motion Artifacts
Understanding Rolling Shutter and Motion Artifacts
At its core, rolling shutter is a fundamental characteristic of most modern CMOS video sensors. Unlike older CCD sensors or true global shutter designs that capture the entire image simultaneously, a rolling shutter sensor scans the image sequentially, typically from top to bottom, line by line. This sequential readout means that different parts of the frame are exposed at slightly different times. While imperceptible in static shots, this time differential becomes glaringly obvious when there's rapid movement within the frame or swift camera motion.
The result of this sequential capture manifests in several distinct motion artifacts:
* Wobble or "Jello" Effect: This occurs when the camera or subject vibrates at a high frequency. Because each line of the sensor is capturing at a slightly different point in time during the vibration, the image can appear to stretch, compress, or undulate like jelly. This is particularly noticeable with handheld shots, lightweight gimbals, or cameras mounted on vehicles over rough terrain.
* Partial Exposure Artifacts: In scenarios with very fast, intermittent light sources (like strobes, camera flashes, or helicopter blades moving faster than the sensor readout), only a portion of the frame might capture the flash or the blade. This creates bands of light or dark, or slices of an object, instead of a complete image.
Cinematographers like Roger Deakins, known for his precise control over every element in the frame, meticulously plans camera movement to avoid such distortions. While he primarily uses cameras with excellent rolling shutter performance, the principle remains: motion artifacts are a real-world constraint. Modern high-end cinema cameras are increasingly publishing readout times, the duration it takes for the sensor to scan one full frame. A shorter readout time directly correlates with less severe rolling shutter artifacts. For example, a camera with a 10ms readout time will exhibit less skew than one with a 30ms readout time under identical motion conditions.
A common mistake is assuming that a camera's "4K" or "8K" resolution, or its classification as a "cinema camera," automatically implies minimal rolling shutter. In reality, some high-resolution modes, especially those that involve heavy downsampling or line-skipping, can have slower sensor readouts and thus worse rolling shutter performance. Furthermore, attempting fast whip pans with prosumer mirrorless cameras without thorough testing is a recipe for visually jarring footage. Similarly, using long telephoto lenses on unstable platforms (such as lightweight tripods, small gimbals, or even handheld without robust support) significantly amplifies the jello effect, making even minor vibrations highly visible.
💡 Pro Tip: Before any shoot, conduct simple rolling shutter tests for each camera mode you plan to use. Pan quickly across a door frame or a patterned wall. Gently tap the tripod or camera body to induce slight vibration. Observe the results. Keep a "no-go" list of camera moves for specific bodies and focal lengths. For instance, "no whip pans with the 85mm handheld" or "no fast lateral dollies at 120fps in full-frame mode." This proactive testing is far more effective than discovering unusable footage in post.
Camera & Sensor Choices to Minimize Rolling Shutter
The choice of camera and sensor can dramatically influence the severity of rolling shutter artifacts. While most contemporary digital cinema cameras use CMOS sensors, their internal architectures and readout speeds vary widely.
Sensor Type and Shutter Modes
The ideal solution for eliminating rolling shutter is a global shutter sensor. These sensors capture all pixels simultaneously, effectively freezing motion at the exact moment of exposure. Global shutter cameras are invaluable for VFX plates, fast-action sequences, and virtual production environments (especially with LED volumes), where rolling shutter can cause obvious distortions that break tracking and compositing. While traditionally limited to specialized or higher-end broadcast cameras, global shutter technology is becoming more accessible in cinema cameras.
However, the vast majority of cameras available today, from professional cinema cameras to mirrorless hybrids, utilize rolling shutter CMOS sensors. Within this category, performance varies significantly. Some rolling shutter sensors are engineered with very fast readouts, making artifacts minimal and often imperceptible in all but the most extreme conditions. Others, particularly in more compact or budget-conscious cameras, may have slower readouts, requiring more careful handling.
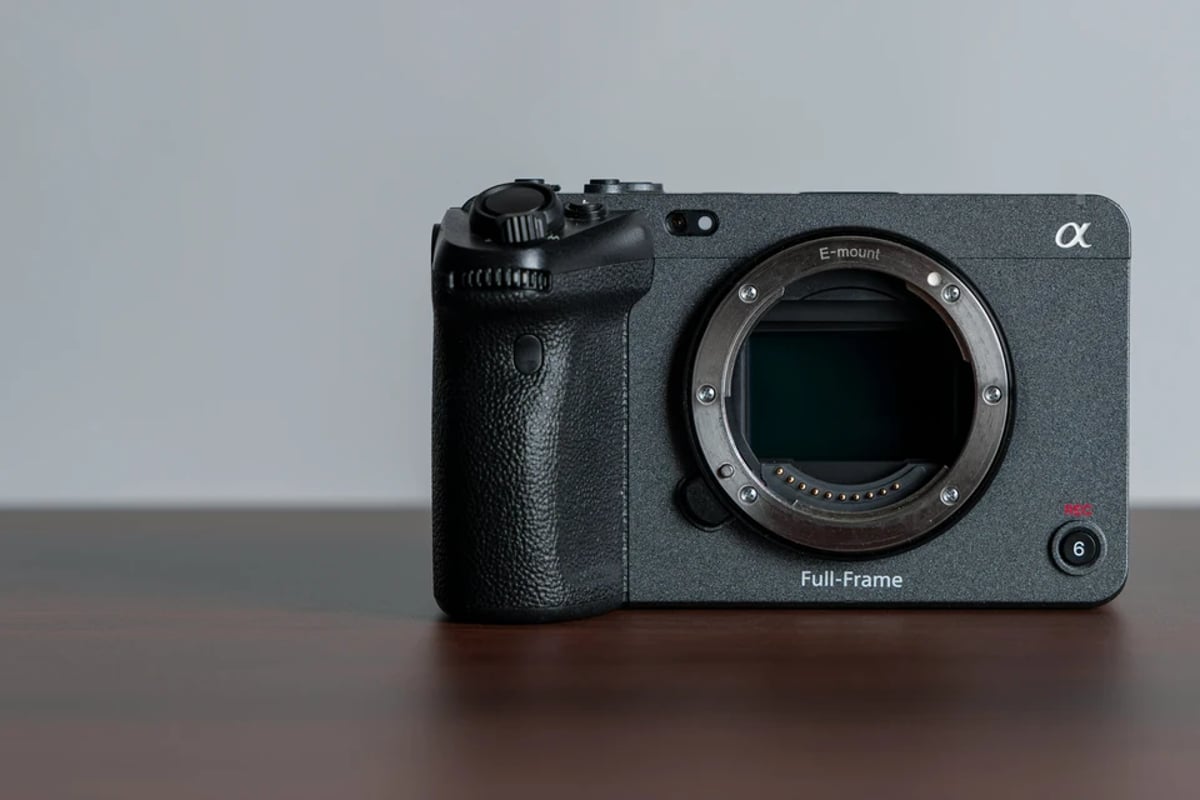
Consider the behavior of popular camera lines: * Sony FX3 / FX30 / FX6 / FX9: These cameras are widely adopted in independent cinema, documentary, and streaming productions. Users frequently report that switching to APS-C/S35 crop mode significantly reduces rolling shutter artifacts. This is because the camera reads a smaller portion of the sensor, which it can do much faster. For a DP using an FX3 for gimbal work, opting for S35 mode on a fast-moving shot can be a critical decision to maintain image integrity.
* Sony a7S III / a7 IV / a6700: These mirrorless bodies are popular for their low-light performance and compact size. While their rolling shutter performance is generally good for their class, professionals typically avoid extreme pans, whip zooms, or significant vibration with long lenses, understanding their limitations.
* Global-shutter cinema cameras: A handful of manufacturers now ship global shutter cinema cameras, most notably RED (KOMODO and V-RAPTOR [X] lines) alongside select broadcast and specialty models from Sony and Blackmagic Design. These are often chosen for productions where motion artifacting is simply not an option, such as high-speed car chases, drone footage where propellers are in frame, or complex VFX shots.
Best Practices & Techniques
When selecting and operating cameras, prioritize modes that offer faster sensor readout: * Utilize S35/APS-C crop modes: As seen with the Sony FX series, cropping the sensor often allows for a faster readout. If your shot allows for a narrower field of view, this can be a simple and effective way to mitigate rolling shutter on full-frame cameras.
* Understand resolution vs. readout speed tradeoffs: Avoid the misconception that higher resolution always equals better performance. Some maximum-resolution modes might involve line-skipping or heavy downsampling, which can lead to slower sensor readouts and increased rolling shutter. Often, a slightly lower resolution mode might offer superior motion rendition.
* Prioritize global shutter for specific scenarios: For productions involving LED walls, intense strobe lighting, or extreme high-speed action, a global shutter camera should be the primary choice. If a global shutter camera is unavailable, rigorous testing of rolling shutter cameras on the actual stage with the specific lighting and motion conditions is essential.
💡 Pro Tip: For multi-camera shoots, conduct a "motion stress test" during prep. This involves performing fast pans, rapid tilts, introducing controlled vibration, and even flashing a strobe light on all camera bodies you intend to use. Review the footage to identify each camera's rolling shutter characteristics and establish standard operating modes and limitations for each. This ensures consistent motion rendition across your project and prevents surprises in post.
Established Industry Practice
For VFX-heavy productions and virtual production workflows, camera specification is often heavily influenced by rolling shutter performance. It's not just about dynamic range or resolution; the ability to cleanly track and composite elements is paramount. Many DPs on television and streaming productions employ a mixed camera package: a global or very fast-readout rolling shutter camera for high-motion sequences or VFX shots, and a higher-resolution rolling shutter camera for more controlled dialogue scenes or beauty shots where the camera movement is minimal. This strategic approach allows them to leverage the strengths of different sensor technologies while mitigating their weaknesses.
A common mistake is to choose camera bodies solely based on marketing specifications like resolution or dynamic range, ignoring the critical factor of rolling shutter behavior. Another pitfall is mixing cameras with vastly different rolling shutter characteristics within the same project without careful planning. This can lead to inconsistent motion rendition that becomes difficult to manage in editorial and color grading.
Always cross-check user reports and independent tests for specific rolling shutter severity in different camera modes. For example, the consensus among Sony FX-series owners regarding the dramatic reduction of skew in APS-C mode is a valuable piece of practical knowledge that informs their gimbal and handheld decisions.
Shutter Speed, Frame Rate & Motion Planning
The interplay between shutter speed, frame rate, and the intended motion is crucial in managing rolling shutter artifacts. These settings don't just define the look of motion blur; they directly influence how noticeable rolling shutter effects become.
Shutter Speed and Motion Blur
Shutter speed dictates the duration of exposure for each frame. A slower shutter speed (longer exposure time) creates more motion blur, while a faster shutter speed (shorter exposure time) results in crisper, more defined motion. This relationship has a direct impact on rolling shutter visibility: Slower Shutter Speed (More Motion Blur): The increased blur can often mask* minor rolling shutter distortions. If an object is already smeared across the frame due to motion blur, slight skew or wobble might be less apparent. For example, at 30 frames per second (fps), a 1/8s shutter speed produces very blurry, smeared motion, described as "dreamy, blurry, almost cinematic... movement smears everywhere... creative, but not clean." This can be a stylistic choice, but it also inherently obscures some motion artifacts.
* Faster Shutter Speed (Less Motion Blur): While a fast shutter provides sharp, staccato motion, it offers less visual information to hide rolling shutter effects. Vertical skew, in particular, can become more pronounced and distracting because the edges of objects are too sharp. This is often seen in action sequences where the desire for crisp detail inadvertently highlights sensor limitations.
Current Best Practices
The 180-degree shutter rule remains the foundational guideline for achieving natural-looking motion blur, and it also serves as an excellent baseline for managing rolling shutter: * 24fps: Approximately 1/48s shutter speed (often rounded to 1/50s).
* 25fps: Approximately 1/50s shutter speed.
* 30fps: Approximately 1/60s shutter speed.
This shutter angle provides a natural amount of motion blur that closely mimics how the human eye perceives movement, and critically, it helps to subtly mask minor rolling shutter issues.
For slow motion, the 180-degree rule should still be maintained relative to the captured frame rate: * 60fps: Approximately 1/120s shutter speed.
* 120fps: Approximately 1/240s shutter speed.
While maintaining the 180-degree rule is generally recommended, slower shutter speeds (e.g., 1/30s or 1/40s at 24fps) can be used sparingly for stylized smear effects. However, always be aware that while this might hide some rolling shutter wobble, it introduces its own distinct aesthetic of motion blur that needs to be intentional.
Motion Planning on Set
The type and speed of camera movement are paramount: * Avoid rapid pans across high-contrast vertical lines: This is the most common scenario for visible vertical skew. If such a shot is unavoidable with a rolling shutter camera, consider pulling back to a wider focal length, slowing the pan, or finding alternative framing that minimizes prominent vertical elements at the edges of the frame.
* Prefer parallax-rich but slower camera moves: Techniques like controlled dolly moves, slider shots, or smooth gimbal arcs generate dynamic parallax without the high-frequency motion that exacerbates rolling shutter. A slow, deliberate handheld drift with good operator technique and stabilization can also be effective.
* Creative slow-shutter techniques: For stylized, dreamlike motion, some filmmakers intentionally shoot at standard frame rates (e.g., 24fps) but use an extremely slow shutter (e.g., 1/8s or even slower, sometimes achieved by setting the capture rate to 8fps equivalent while maintaining 24fps playback). This creates a strong motion smear that, while not "clean," is a deliberate aesthetic rather than an accidental artifact.
💡 Pro Tip: When a shot demands a fast pan, cinematographers often subtly slow the pan speed and ensure the shutter is set to the ~180-degree rule. The natural motion blur then helps to mask any residual rolling shutter. During gimbal operations, experienced operators will rehearse a move, feeling how the camera's rolling shutter responds, and adjust their speed and path to minimize artifacts. For car-mounted shots or fast lateral movement, framing is critical: avoid placing tall vertical lines near the edges of the frame, where skew is most pronounced.
Common Mistakes
A frequent error is using an extremely fast shutter speed (e.g., 1/500s to 1/1000s at 24fps) for standard narrative work. This results in choppy, staccato motion, which is rarely desired outside of specific action sequences (like the "Saving Private Ryan" aesthetic). More importantly, it strips away any natural motion blur that could hide rolling shutter skew, making the artifacts far more obvious. Another mistake is inconsistently mixing shutter speeds within the same scene or shot list without a clear creative justification, leading to jarring differences in motion rendition.
Stabilization, Lenses & Rigging to Reduce Artifacts
Even with optimal camera settings, physical stability is critical. How the camera is supported and the choice of lens directly impact the visibility of rolling shutter artifacts, particularly the "jello" effect.
Stabilization Systems
Modern filmmaking employs a range of stabilization tools, each with its own interaction with rolling shutter: * In-Body Image Stabilization (IBIS) and Optical Image Stabilization (OIS): Many mirrorless and some cinema cameras feature IBIS (sensor-shift) or OIS (lens-based). These systems are excellent for smoothing moderate hand shake and minor vibrations. However, they can sometimes interact unpredictably with rolling shutter during very fast, erratic movements, potentially introducing subtle warping or micro-jello artifacts if the system "hunts" for stabilization.
* Electronic/Gyro-based Stabilization: Increasingly, cameras record internal gyroscope data. This data can be used by in-camera algorithms or post-production software to digitally stabilize footage. This is particularly advanced in action cameras and 360 cameras, where robust stabilization is paramount. For example, the Insta360 X5 8K 360° action camera heavily relies on its proprietary FlowState Stabilization. The manufacturer explicitly recommends keeping it active for most situations to ensure smooth footage, demonstrating how modern cameras integrate hardware and software stabilization to deliver stable results even from highly mobile, small form factors.
* Mechanical Stabilization: Gimbals (e.g., DJI RS series, Ronin series), Steadicam rigs, sliders, dollies, and robust tripods remain the gold standard for reducing vibration and controlling camera movement speed. These systems mechanically isolate the camera from operator shake or environmental vibration, directly mitigating rolling shutter artifacts by preventing the rapid, high-frequency movements that cause jello.
Lens Choice and Focal Length
The focal length of your lens has a profound effect on how camera movement and vibration are perceived: * Long Telephoto Lenses: These lenses magnify not only the subject but also any camera shake or micro-vibration. Even a slight tremor becomes a significant displacement in the frame, making rolling shutter wobble much more apparent.
* Wide Lenses: Conversely, wide-angle lenses reduce the apparent amplitude of shake. The same physical camera movement results in less angular displacement at a wider focal length, making rolling shutter artifacts less noticeable. However, very wide lenses can introduce barrel distortion, which, while not a rolling shutter artifact itself, can complicate the perceived motion if not managed.
Industry practice dictates using wider lenses for handheld or gimbal work on rolling shutter bodies, especially when movement is dynamic. Longer lenses are reserved for situations where robust support is guaranteed, solid tripods, heavy-duty dollies, or professional camera cranes and remote heads.
💡 Pro Tip: Many cinematographers will turn off IBIS/OIS for locked-off tripod shots. This prevents the stabilization system from "hunting" for motion that isn't there, which can sometimes introduce subtle micro-movements that exacerbate rolling shutter in an otherwise stable shot. For car-mounted cameras or other situations with significant vibration, intentionally slowing the vehicle or choosing smoother roads can drastically reduce the high-frequency jello effect.
Rigging Best Practices
Solid rigging is fundamental: * Ensure Solid Mounting: All camera plates, tripod heads, and mounting points must be absolutely tight. Flexible or cheap tripods and gimbal plates can introduce subtle vibrations or flex, which translate directly into wobble.
* Minimize Flex: Any flex in car rigs, handlebars, or improvised camera mounts will be amplified and contribute to rolling shutter artifacts. Use rigid, purpose-built rigging where possible.
* Add Mass: Heavier camera setups and rigs tend to produce smoother motion. The increased inertia makes them less susceptible to small, high-frequency jitters. A heavy-duty fluid head on a substantial tripod will absorb more vibration than a lightweight travel tripod.
A common mistake is over-relying on digital stabilization to fix extremely shaky footage. While post-stabilization can help, rolling shutter distortions are baked into each frame. If the underlying motion is too extreme, digital stabilization can introduce new distortions or "boiling" textures, compounding the problem rather than solving it. Another error is mounting lightweight cameras on flexible supports (e.g., small suction cups on thin plastic panels) for high-speed work without rigorous vibration testing.
Post-Production Tools & Workflows for Fixing Rolling Shutter & Motion Problems
While the best defense against rolling shutter artifacts is robust capture technique, post-production tools offer a crucial last line of defense. However, it's vital to understand their capabilities and limitations.
What Can Be Fixed in Post
Post-production software can address several aspects of rolling shutter and motion issues: * Rolling Shutter Correction: Many non-linear editing (NLE) systems and visual effects (VFX) packages include dedicated tools designed to counteract the skew, wobble, and partial exposure artifacts caused by rolling shutters. These tools typically work by analyzing the motion in the frame and attempting to "undo" the sequential scanning distortion.
* Stabilization: Post-stabilization is a standard feature across virtually all editing and VFX software. Tools like warp stabilization or optical flow smoothers analyze pixel motion to smooth out unwanted camera shake. Some advanced systems can even leverage embedded gyro data from the camera to achieve highly accurate stabilization. For more on managing your post-production pipeline, including crucial metadata, see our guide on Camera Reports That Help Post: Metadata That Prevents Reconform Pain.
Current Shipping Software & Tools
The professional toolkit for post-production rolling shutter and motion correction is comprehensive: * Adobe Premiere Pro: Features a "Rolling Shutter Repair" effect that models and compensates for CMOS sensor distortion. It also includes the "Warp Stabilizer" for smoothing camera motion.
* Adobe After Effects: Offers more granular control over rolling shutter repair and stabilization, making it suitable for VFX-heavy shots where precise manipulation is required.
* DaVinci Resolve Studio: Provides powerful image stabilization modes and advanced motion estimation tools. While it doesn't have a single "rolling shutter" button, its robust optical flow and tracking capabilities allow for sophisticated correction workflows, often implemented by experienced colorists or VFX artists.
* Final Cut Pro: Includes built-in stabilization features and tools to reduce distortion often associated with rolling shutter footage.
* Specialized VFX Tools: Software like Foundry's Nuke or Blackmagic Design's Fusion provides advanced grid warping, tracking, and motion estimation capabilities that can be used to meticulously correct even severe rolling shutter issues on critical shots, though this is a time-intensive process.
Best Practices in Post
The order of operations in post-production can significantly impact the effectiveness of your corrections: * Apply Rolling Shutter Repair First: As a general rule, address rolling shutter issues before applying other major effects like stabilization, compositing, or complex color grading. This ensures that the correction isn't fighting against or being distorted by subsequent transformations.
* VFX Workflow: For shots involving visual effects (tracking, rotoscoping, set extensions), rolling shutter can completely break camera tracking. The industry standard practice is to correct rolling shutter first, then perform camera tracking, and finally proceed with compositing. This ensures that the motion data is clean and accurate.
* Utilize Test Shots: Early in the post-production process, run some of your most challenging footage through your proposed rolling shutter correction and stabilization workflow. This helps the DP, editor, and VFX supervisor understand the limits of what can be fixed and informs decisions about which shots might need extra attention or even replacement.
💡 Pro Tip: Experienced colorists and VFX supervisors often flag problematic shots during dailies review. They can identify footage that will require significant rolling shutter repair or that might pose challenges for tracking. On projects with substantial handheld or action sequences, many teams establish a standard correction preset (per camera body and mode) that can be applied upon ingest to normalize motion behavior across the entire show. When faced with severely distorted footage, the most efficient solution is often to substitute or intercut with a cleaner shot, rather than spending excessive time trying to "save" an unsalvageable take.
Common Mistakes
A critical mistake is assuming that post-production tools can magically fix any severe rolling shutter. While powerful, these tools have limits. Extreme skew or jello often leaves behind noticeable artifacts, even after correction. Overusing warp-style stabilization is another common pitfall. While it can smooth motion, it can also introduce new distortions, "boiling" textures, or a rubbery feel, which can compound the original rolling shutter problems. Finally, applying rolling shutter correction and stabilization in the wrong order can lead to less effective fixes, as the algorithms might be working against each other.
Professionals understand that rolling shutter is a capture problem, not just a post-production problem. They avoid treating it as a "fix it in post" issue. Ignoring sensor mode differences, blindly shooting everything at maximum resolution, and performing untest ed fast pans or long telephoto shots on unstable rigs are all common errors. Instead, they prioritize pre-production testing, establish clear movement discipline for operators, make informed camera and rigging choices, and implement smart post-production workflows that involve early rolling shutter correction and collaborative decision-making across departments.
Interface & Handoff Notes
Understanding the inputs and outputs related to rolling shutter management is critical for a smooth pipeline.
What you receive (upstream inputs): * Camera RAW/Log footage: This is the primary input, hopefully accompanied by detailed camera reports including camera model, lens, frame rate, shutter speed, and any special modes (e.g., S35 crop) used.
* Gyro data (if available): Some cameras embed gyro data in their files (e.g., DJI drones, some mirrorless cameras). This data is invaluable for highly accurate post-stabilization that can mitigate rolling shutter effects.
What you deliver (downstream outputs): * Clean, stabilized footage: The primary output is footage free from distracting rolling shutter artifacts and unwanted camera shake. This is often delivered to editorial as a corrected proxy or as a final graded clip for VFX.
* VFX plates: For shots that require visual effects, the corrected (de-skewed) footage is delivered as VFX plates, ensuring that tracking markers and background elements are stable for compositing.
Top 3 failure modes for THIS specific topic:
1. Untested Camera Modes: Not understanding how rolling shutter behaves in different camera settings (e.g., full-frame vs. crop, different frame rates) leads to unexpected artifacts that are difficult or impossible to fix.
2. Over-reliance on Post-Production: Assuming that all rolling shutter issues can be "fixed in post" leads to capture choices that are fundamentally flawed, resulting in extensive, costly, and often imperfect post-production work.
3. Inconsistent Application of Correction: Mixing footage with and without rolling shutter correction, or applying correction inconsistently across a scene, creates visual discontinuity that distracts the audience.
Browse This Cluster
- Cinematography Pipeline Guide: From Camera Tests to Deliverables
Next Steps
Ready to see how this fits into the bigger picture? Start with the complete guide.
📚 Complete Guide: Cinematography Pipeline Guide: From Camera Tests to Deliverables
---
© 2026 BlockReel DAO. All rights reserved. Licensed under CC BY-NC-ND 4.0 • No AI Training. Originally published on BlockReel DAO.